
TILE - LUXURY VINYL PLANK
FLOORS - BACKSPLASHES - SHOWERS
WE HAVE HUNDREDS OF PORCELAIN - NATURAL STONE CERAMIC - GLASS AND METAL TILE FOR ANY APPLICATION
WE CAN INSTALL OR YOU CAN
WE CAN BEAT MOST COMPETITORS PRICES
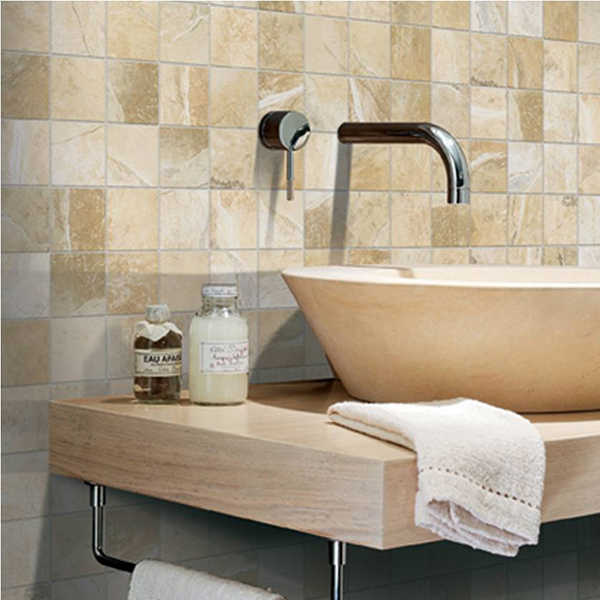
PORCELAIN TILE
BECAUSE THERE ARE SO MANY VARIATIONS OF FLOOR TILE WE ARE PROVIDING LINKS TO OUR SUPPLIERS WEBSITES SO YOU CAN FIND A TILE THAT YOU LIKE
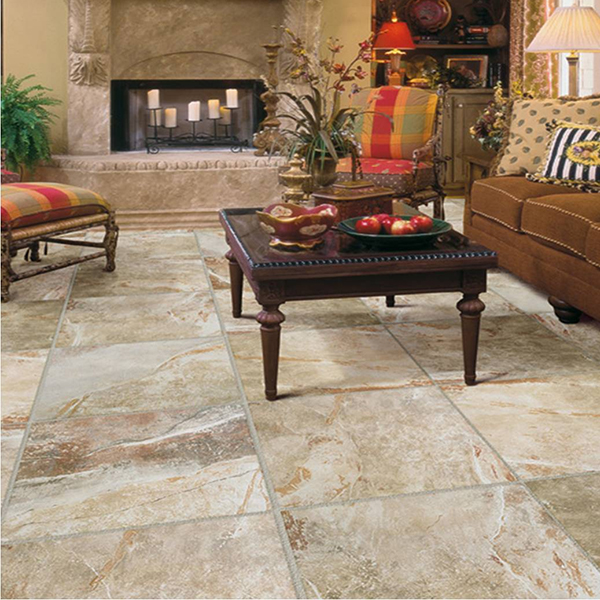
NATURAL STONE
BECAUSE THERE ARE SO MANY VARIATIONS OF FLOOR TILE WE ARE PROVIDING LINKS TO OUR SUPPLIERS WEBSITES SO YOU CAN FIND A TILE THAT YOU LIKE
HERE IS A GREAT TOOL FOR FIGURING TILE AMOUNT YOU WILL NEED, CLICK ON THE LINK BELOW
BENEFITS OF PORCELAIN TILE
Beautiful
From rugged stone looks to sophisticated high-gloss selections, Porcelain offers lasting design solutions for both residential or commercial environments.
Versatile
With a full range of styles, sizes, finishes and colors plus innovative border, accent and pattern options, Porcelain offers you virtually limitless design possibilities indoors and out.
Fire Resistant
Porcelain tile doesn't burn or emit toxic fumes. When a lighted cigarette is dropped on the floor, even if allowed to sit, will not do any damage to ceramic tile. Even hot kitchen pans or skillets will not scorch or melt the surface of glazed ceramic tile.
Scratch Resistant Ceramic tile is graded for hardness. Grade III and Grade IV glazed ceramic tiles are extremely resistant to scratching and you never have to worry about a crack or break like you do with some other types of floors.
Durable
On the MOH's hardness scale, wear-resistant Porcelain outperforms slate, marble and even granite for a surface stronger than stone that makes a lasting impression throughout your home or office.
The flawless beauty of Porcelain adds function and style to residential and commercial environments alike. It withstands the rigors of everyday life beautifully to maintain its beauty for generations to come.
More Wear Resistant
When it comes to wear resistance, Porcelain simply outperforms most all types of slate, marble and even granite.
Unique Through-Body Color
Turn a foyer into a grand entrance, or transform an ordinary living room into a gracious space for entertaining. Porcelain can also make your hard working kitchen a whole lot easier to keep clean. And, best of all, colors and patterns flow beautifully from room to room, creating a house that's truly a home.
Brief Summary
Ceramic tile is a practical, functional choice for your floor, walls or countertops that offers you a unique opportunity for self-expression because of its beauty, versatility and design potential.
There is an extensive range of colors, textures, sizes and styles will allow you to reflect your personal style, and create a living space that is a reflection of you!
Natural stone tiles are distinct and unique
You should always view several pieces of the tile that is to be installed before the installation begins. Since it has been created by nature, not only are no pieces exactly alike, those two pieces may not even be very similar.
The most common natural stone tiles include
Slate, flagstone (sandstone), marble, granite, travertine and limestone. Each stone has unique characteristics and maintenance requirements.
Generally, you should seal natural stone tile before grouting
Unless you are planning on using the grout color in the stone as a design element.
Most natural stones are not resistant against common household acid (lemon juice) or oil stains
Therefore, you should use a penetrating sealer for all natural stones after installation. Follow manufacturers instructions on frequency of re-application.
The advantages of natural stone
Timeless, unique appearance
Design capabilities of through-body color material
Perceived value
Durable countertops and floors (granite)
May be re-polished if scratched
The disadvantages of natural stone
Ongoing re-sealing program is required
Limited chemical and stain resistance
Higher installation costs than ceramic tile
Product received seldom looks like the sample
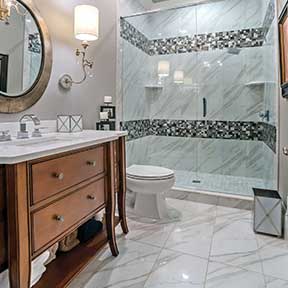
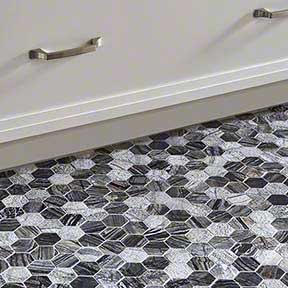
BACKSPLASH TILE
Mosaic Backsplash Installation Instructions
Substrate Preparation:
The substrates need to be clean, compact, perfectly flat and free of dirt and cracks. Nylon or wire brush can be used in cleaning the residues on the surface. If the brush cannot remove the entire residue use bead blasting or sand blasting. Fix all the uneven area of the surface; leveling compound might be needed to make the surface perfectly flat. Small cracks can be fixed using crack suppression membrane or patch. Consult an engineer for an assessment of large cracks because this might cause problem in the future.
Tools & Equipment
Mastic
Measuring tape
Square
Utility knife
Grease pencil*
1/16 – 3/16 V Notch Trowel
Margin trowel
Non-Sanded grout
Finish Nails
Grout Float
Level*
Spacers
Towel or rags
Bucket of water
Sponge
Nylon or wire brush
Wet Saw with a fine grit diamond blade
Laying Mosaic:
Before starting the installation inspect all mosaic sheets and make sure that material is in good condition and no defects. Identify the starting point where to start guidelines that will help the lay out to be straight and symmetrical while installing.
The size of the trowel depends on the thickness of the mosaic tiles, thinner the material the smaller the trowel.
The mosaic, unless otherwise specified by the customer, is usually laid on white mastic or thinset to avoid altering its color White thinset is usually recommended to use for the glass and other light or transparent product to avoid discoloration of the background.
Once the starting grid has been marked, using the flat side of the v-notched trowel apply a layer of thinset and use the notched side to go over the thinset to make uniform depth. Make sure to apply only enough adhesive to area that you can tile within 15 mins because it dries very quick.
Once the adhesive is spread over the surface start laying down the mosaic sheets. Using grout float press the mosaic sheet against the surface to guarantee perfect adhesion. Using the same tool correct any alignment errors by lightly tapping the sides of the sheet. If the sheet starts to slide down, place few finish nails on the last grout line on the top to keep it in place and move on the next tile.
After one section is done, use damp sponge to clean up any residues of the thinset that squeezed up between tiles. Thinsets usually require at least 24 hours for curing, for more time check the manufacturers recommendation.
Cutting Mosaics Using Wet Saw:
Always keep your hands as far away from the blade as possible.
Always wear eye protection. Pieces of tile are extremely sharp, and there is always a risk of pieces flying into your eyes.
For best results, use slow even pressure to push the tile through the wet saw’s blade.
A 6000 RPM Glass Wet Saw Cutting Blade Can Be used for most Glass, Natural Stone and Metal Mosaic Projects. Check with your tile or wet saw manufacturer for more detailed blade recommendations.
When cutting smaller tile pieces, use a base of wood or tile under the piece being cut.
Excess water will weaken your adhesive: After cutting tiles, dry off the tile completely with a towel or rag before putting it into the place.
Use a grease pencil to mark the front of the tile, then use a square to draw straight lines.
Do not mark the back of Mosaic tiles with anything other than Pencil or Wax Crayon, as it can cause it not to adhere properly to the wall.
Wet Saw with a fine grit diamond blade
When cutting mosaic on a wet saw, put a tile or a piece of hard plastic down on the cutting tray. This is necessary to keep the mosaic from falling in the wide opening on the blade channel tray to be able to make a good straight cut.
Cutting Mosaics Using Wet Saw:
Before applying grouts make sure that the adhesive is set and firm and the tiles are clean. Non-sanded grout is the recommend grout to use for mosaic sheets due to small grout joints. Never use sanded grout on polished glass mosaics this will scratch the material. Never use Epoxy grouts for the glass mosaic tiles, unless specified by the manufacturer.
Using grout float apply the grout on the tiles. Use vertical and horizontal stroke to spread the grout. Apply a little pressure to make sure that all the joints are well filled.
While the grout is still fresh, stroke diagonally the long edge of the grout float to remove excess grout and then wipe it with wet sponge to clean.
Once the grout is set and dry and if there is still residue use nylon brush to clean and then apply grout sealer according to manufacturers instructions.
VISIT OUR SHOWRROM
TO SEE ALL OF OUR TILE SELECTIONS
BECAUSE THERE ARE SO MANY VARIATIONS OF BACKSPLASH TILE WE ARE PROVIDING LINKS TO OUR SUPPLIERS WEBSITES SO YOU CAN FIND A TILE THAT YOU LIKE
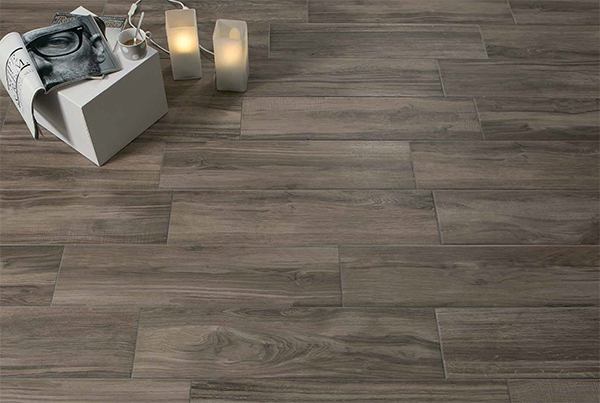
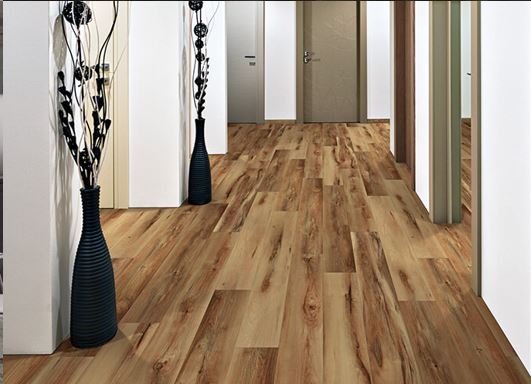
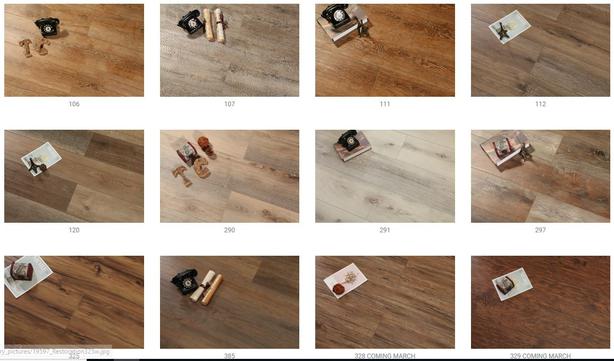
LUXURY PLANK VINYL
BECAUSE THERE ARE SO MANY VARIATIONS OF FLOOR TILE WE ARE PROVIDING LINKS TO OUR SUPPLIERS WEBSITES SO YOU CAN FIND A TILE THAT YOU LIKE

LIMITED LIFETIME RESIDENTIAL WARRANTY
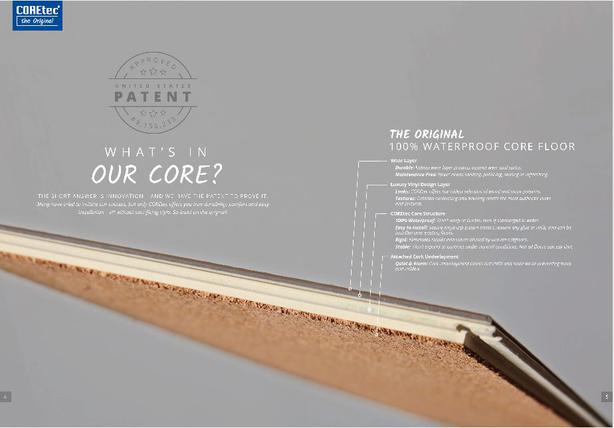
100% WATERPROOF
CAN INSTALL OVER TILE, SHEET VINYL OR WOOD


30 YEAR RESIDENTIAL WARRANTY
Rigid Core 9x60 luxury vinyl plank with various colors and types available. Each wood has a painted beveled edge to give the look of a true installed wood with the toughness actual wood cannot sustain. The SPC composition is 4.0 MM and 1.5 MM backing for a 5.5 MM total product.
20 mill wear layer with a 30 year residential warranty and a 10 year light commercial warranty. The product comes with a heavy duty trim including T-mold, Reducer, End Cap, and Stair nose